How to Enable Redis Object Cache (cPanel + WordPress)
This guide walks you through enabling Redis Object Cache on your hosting account and configuring the WordPress plugin correctly.
1. Understanding LiteSpeed Cache Components
The LiteSpeed Cache consists of three components:
- The LiteSpeed Web Server Cache:
-
Enables caching for your website at the server level. It is enabled per-site.
-
Stores and serves cached pages
-
Bypasses WordPress and PHP for faster load times
-
Required for caching to function
-
- WordPress LiteSpeed Cache Plugin:
-
Requires the LiteSpeed Cache (above) to be enabled to function
-
Controls how caching behaves within WordPress
-
Manages cache rules and automatic clearing (purge)
-
Provides additional optimisation features
-
- Redis Object Cache:
-
Caches database query results (objects), not pages or images
-
Speeds up dynamic content (e.g. logged-in users, WooCommerce, admin area)
-
Reduces load on the database
-
Works alongside page caching (does not replace it)
-
Follow each step below to enabled these caches in order to avoid conflicts.
2. Determine the Current Cache and Plugin Status
Before making changes, confirm whether Redis Cache is already active. We also need to ensure that the LiteSpeed Cache plugin is installed.
In WordPress
-
Log in to your Wordpress admin dashboard.
-
Scroll down and locate and click on LiteSpeed Cache.
- If this is not listed, you will need to install the LiteSpeed Cache plugin first. Please see this KB article for details.
-
On the Dashboard page, there is a tile named 'Cache Status'.
-
If the value of 'Object Cache' is 'OFF', then the cache is disabled.
-
3. Enable Redis in cPanel
-
Log in to cPanel
-
Go to LiteSpeed Redis Cache Manager
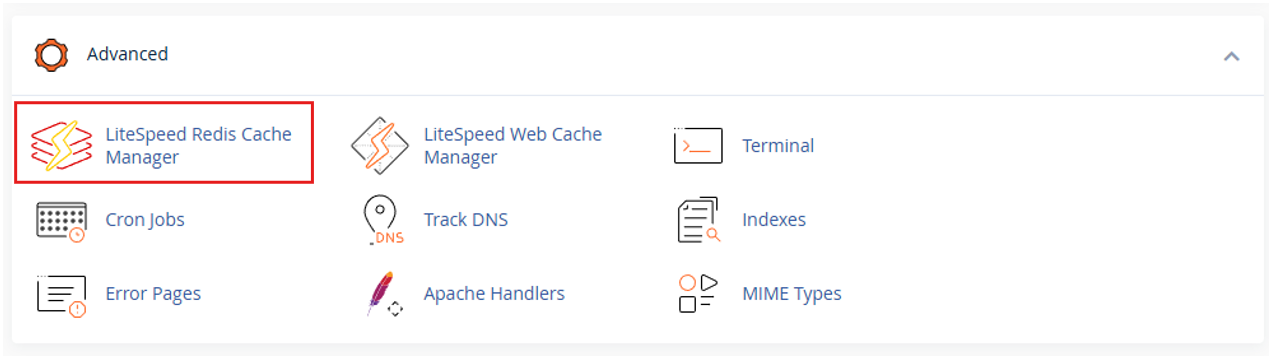
-
Click Enable Redis Service
4. Enable Object Cache in WordPress
-
Go to LiteSpeed Cache → Cache → Object
-
Set Object Cache = ON
-
Set Method = Redis
Configure Connection
-
Host:
/tmp/redis.sock -
Port:
0(required when using socket)
-
Click Save Changes
-
Object cache is now active
5. Verify Connection
-
Check status messages:
-
Redis Extension: Enabled
-
Connection Test: Passed
-
If it doesn’t pass:
-
Redis service is not enabled in cPanel
-
Socket path is incorrect
6. Summary
-
Enable Redis in cPanel
-
Enable Object Cache in plugin
-
Use socket:
/tmp/redis.sock -
Confirm connection passes
Redis is now handling database-level caching alongside LiteSpeed’s page cache.
7. Troubleshooting Tips
-
If Redis does not connect:
-
Make sure Redis Service has been enabled in cPanel
-
Make sure Method is set to Redis
-
Make sure Host is exactly
/tmp/redis.sock -
Make sure Port is set to
0 -
Save the settings and re-check the Status panel
-
